
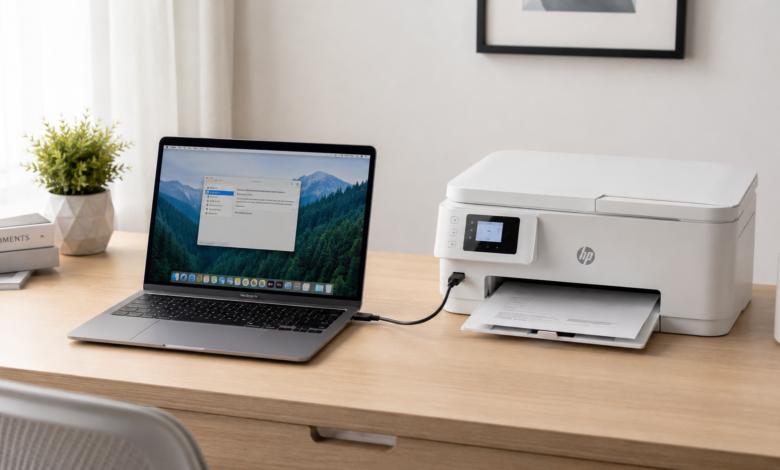
Adding a printer to a Mac usually takes less than five minutes, but the exact steps depend on how your printer connects. A USB printer often installs itself the moment you plug it in. A wireless printer needs your Mac and the printer on the same network before it will show up. A printer shared from another computer or a work network needs a slightly different setup involving an IP address or a shared queue.
This guide walks through every method, starting with the fastest option for most home users and moving into network setups, troubleshooting, and printer management once your printer is installed.
What You Need Before Adding a Printer to a Mac
Before opening any settings, confirm three things. First, your printer is powered on and out of sleep mode, since some models take a moment to wake up and become discoverable. Second, if the printer is wireless, it is already connected to your home Wi-Fi network, not just turned on. Most printers have a small screen or a network button that lets you join Wi-Fi directly from the printer itself. Third, your Mac is running a reasonably current version of macOS, since Apple regularly updates the built-in driver library that lets printers work without extra software.
If your printer is brand new, check the manufacturer’s website for a Mac driver or companion app before connecting it. HP, Canon, Epson, and Brother all maintain free driver downloads, and installing the official driver first often gives you access to features like duplex printing or ink level monitoring that the generic Apple driver does not expose.
How to Add a Printer to a Mac Using System Settings
This is the standard method for USB, wireless, and Bluetooth printers, and it works the same way across recent versions of macOS.
Step 1: Connect or Power On the Printer
Plug in a USB printer directly to your Mac, or confirm a wireless printer is connected to the same Wi-Fi network as your Mac. Skip this step for AirPrint printers already on your network, since macOS can usually detect them without any manual connection.
Step 2: Open Printers & Scanners
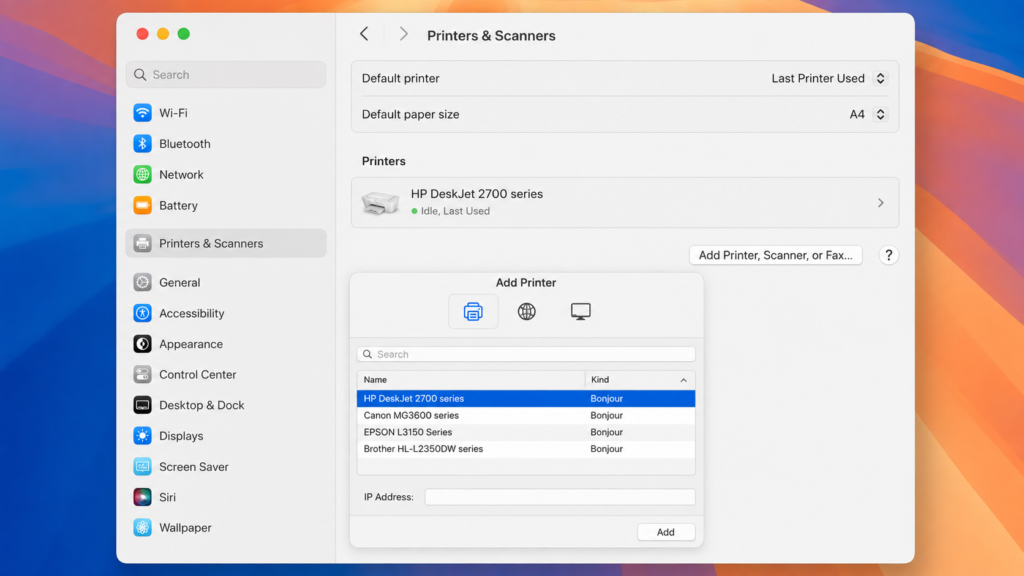
Click the Apple menu in the top left corner, then choose System Settings. Select Printers & Scanners from the sidebar. On older versions of macOS, this menu is called System Preferences instead of System Settings, but the printer panel looks and works the same way.
Step 3: Add the Printer
Click the Add Printer, Scanner, or Fax button, shown as a plus sign near the printer list. macOS will search the network and any connected devices for a few seconds. Your printer should appear by name in the list that comes up.
Step 4: Select the Printer and Confirm the Driver
Click your printer’s name once it appears. macOS automatically selects a driver in the Use field, usually labeled with the printer’s exact model name or as AirPrint. If your printer supports AirPrint, leave this setting as is, since it gives the most reliable results without extra software. If you already installed a manufacturer driver, choose it from this dropdown instead for access to full feature support.
Step 5: Click Add
Click the Add button. macOS installs the driver and adds the printer to your list, usually within ten to twenty seconds depending on the driver size. The printer is now ready to use from any app’s Print dialog.
How AirPrint Makes Adding a Printer to a Mac Easier
Most printers sold in the last decade support AirPrint, Apple’s built-in printing standard. If your printer supports it, you generally do not need to download any software at all. As long as the printer and Mac share the same Wi-Fi network, the printer shows up automatically in the Add Printer list, already labeled as an AirPrint device.
AirPrint has one real limitation worth knowing about: it exposes only the core features every printer shares, like paper size and basic quality settings. It usually will not show advanced options such as specific paper tray selection, borderless photo printing, or detailed ink management. If you rely on those features, install the manufacturer’s driver instead, since it replaces the generic AirPrint entry with a fuller feature set while still using the same Add Printer process.
How to Add a Network or Shared Printer by IP Address
Office printers and some higher-end home printers do not always broadcast themselves for automatic discovery, especially on business networks with stricter settings. In that case, add the printer manually using its IP address.
First, find the printer’s IP address. Most printers display it on their built-in screen under a network or Wi-Fi settings menu, or you can print a network configuration page directly from the printer’s control panel. Once you have the address, open Printers & Scanners on your Mac and click Add. At the top of the Add Printer window, click the IP tab instead of the default Default tab.
Enter the printer’s IP address in the Address field. For Protocol, choose Line Printer Daemon (LPD) unless your IT department specifies otherwise, since it works with the widest range of office printers. macOS will attempt to detect the correct driver automatically. If it cannot, select Generic PostScript Printer from the Use menu as a reliable fallback that supports basic printing on nearly any network printer.
How to Add a Printer Shared From Another Computer
If a printer is connected to another Mac or a Windows PC on your network and shared from there, it can appear in your Add Printer list as a shared device without needing its own network connection.
On the computer the printer is physically connected to, sharing needs to be turned on first. On a Mac, this is done in Printers & Scanners by selecting the printer and enabling the Share This Printer On the Network option. On a Windows PC, printer sharing is enabled through the Devices and Printers control panel.
Once sharing is active, open Printers & Scanners on your Mac, click Add, and look in the default list under the Default tab. Shared printers usually appear with a small icon showing they connect through another computer rather than directly. Select it and click Add exactly as you would for any other printer.
Troubleshooting When a Printer Will Not Show Up on a Mac
A printer that does not appear in the Add Printer list almost always comes down to one of a few common causes.
Network mismatch is the most frequent issue. Many printers create their own separate Wi-Fi network during setup, and if your Mac never switched over to the printer’s actual home network, it will never find it. Check the printer’s screen to confirm exactly which network name it joined, then compare that to the Wi-Fi name shown in your Mac’s menu bar.
Outdated software causes a smaller but real share of failures. Go to the Apple menu, then System Settings, then General, then Software Update, and install any pending macOS updates, since Apple regularly ships new printer drivers through these updates rather than through the App Store.
A sleeping printer will not respond to a search request. Many inkjet printers power down their Wi-Fi radio after a period of inactivity, so send a print job or press a button on the printer to wake it before trying Add Printer again.
Router settings occasionally block discovery too. Some routers isolate wireless devices from each other for security, a feature usually called AP Isolation or Client Isolation. If your printer and Mac are both connected but the printer still will not appear, check your router’s wireless settings for this option and disable it if it is switched on.

If none of these fixes work, remove any old, greyed-out entries for the same printer from Printers & Scanners first, then restart both the Mac and the printer before trying to add it again. A stale driver reference is one of the more common reasons a printer refuses to reconnect after a name or IP address change.
How to Set a Default Printer on a Mac
Once more than one printer is added, macOS needs to know which one to use automatically. Open Printers & Scanners, then use the Default Printer dropdown near the bottom of the window to choose which printer should be selected by default in every Print dialog. Selecting Last Printer Used instead of a fixed printer is useful if you regularly switch between two or three printers and want macOS to remember your most recent choice.
How to Remove a Printer From a Mac
To remove a printer, open Printers & Scanners, select the printer from the list on the left, and click the minus button below the list. This removes the printer’s queue and driver reference from your Mac without affecting the printer itself, which stays available to add again later if needed.