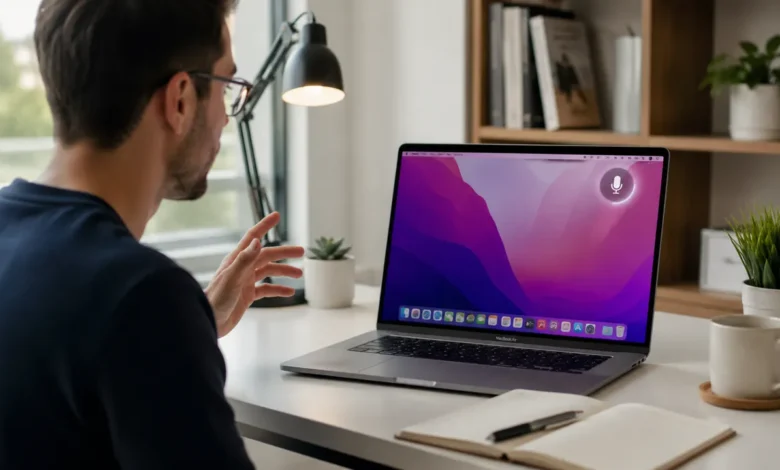
Dictation on Mac lets you talk instead of type in almost any app, from Mail and Messages to Pages and Notes. Apple built the feature directly into macOS, so you do not need to install anything extra to get started. This guide walks through turning dictation on, using it correctly, fixing common problems, and getting cleaner results with less editing afterward.
Whether you are dealing with wrist strain, writing long emails, or just prefer speaking your thoughts, dictation on Mac can genuinely replace typing for most everyday tasks once it is set up correctly.
What Is Dictation on Mac and How Does It Work
Dictation is Apple’s built-in speech-to-text tool. It listens through your Mac’s microphone and converts spoken words into typed text wherever your cursor is placed. It works inside nearly every text field on macOS, including web browsers, word processors, and chat apps.
There are two versions of dictation available on modern Macs. Enhanced Dictation processes speech directly on your device, which means it keeps working without an internet connection and handles longer sessions. Standard online dictation sends short audio clips to Apple’s servers for processing and has a time limit per session, usually around 60 seconds on older macOS versions.
Most current Macs default to on-device dictation, so you get unlimited dictation time and better privacy since your voice data does not leave the machine.
How to Turn On Dictation on Mac
1. Enabling Dictation in System Settings
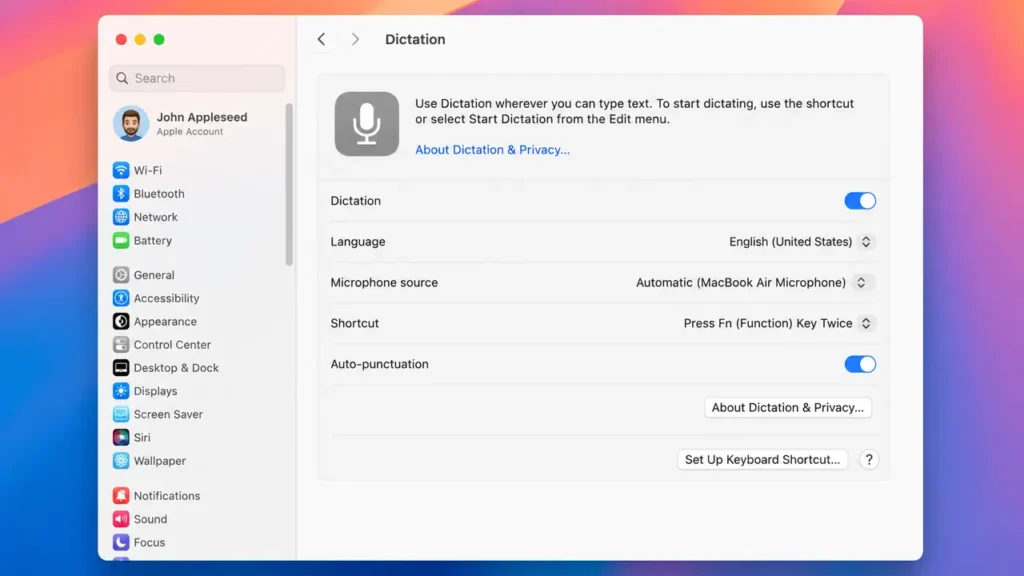
Turning on dictation takes less than a minute. Open the Apple menu, choose System Settings, then click Keyboard in the sidebar. Scroll down to the Dictation section and toggle it on. macOS may prompt you to download a language file the first time you enable it, especially if you plan to use offline dictation.
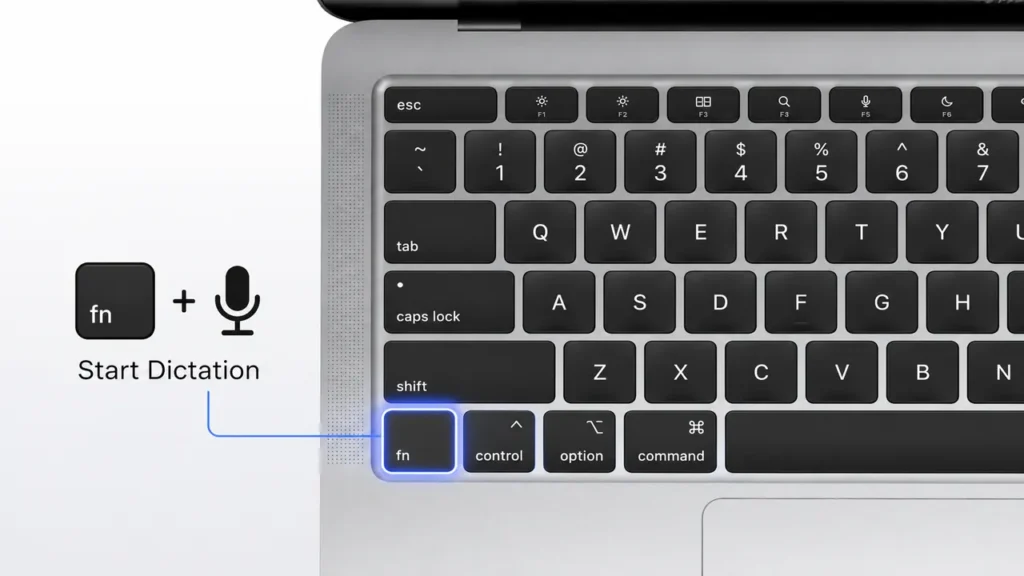
Once enabled, you will see a keyboard shortcut listed for triggering dictation, which by default is pressing the microphone key twice or using Fn twice on newer keyboards.
2. Choosing Online vs Offline Dictation
Inside the same Dictation settings panel, you can pick whether your Mac uses on-device processing or sends audio to Apple’s servers. On-device dictation is the better choice for most people because it removes the time limit and works without Wi-Fi. Choose the online option only if you need language support that is not yet available offline, since Apple periodically expands offline language coverage with macOS updates.
If privacy matters to you, stick with on-device processing. Your audio stays local and is never transmitted anywhere.
How to Start Dictating Text on Mac
1. Using the Keyboard Shortcut
Once dictation is enabled, click into any text field, whether that is an email draft, a Pages document, or a Notes entry. Press the assigned shortcut, usually double-tapping Fn or the microphone key, and a small microphone icon will appear on screen. Start speaking naturally, and your words will appear as text in real time.
To stop dictating, press the same shortcut again, or simply pause and click elsewhere. Saying “stop dictation” out loud also ends the session on most macOS versions.
2. Using the Microphone Icon
If your keyboard does not have a dedicated dictation key, you can trigger it from the Edit menu in many apps, where a Start Dictation option often appears near the bottom. Some apps also show a microphone icon directly inside text fields, particularly Apple’s own apps like Notes and Mail.
Useful Dictation Commands and Punctuation
Dictation on Mac understands more than plain words. You can speak punctuation and formatting commands, and macOS will insert them correctly. Saying “comma” inserts a comma, “period” or “full stop” ends a sentence, and “new paragraph” starts a fresh paragraph. “New line” moves to the next line without the paragraph spacing.
You can also dictate capitalization by saying “cap” before a word to capitalize just that word, or “caps on” and “caps off” to capitalize everything in between. Numbers, email addresses, and common symbols like “at sign” or “hashtag” are recognized automatically in most contexts.
Learning a handful of these commands makes a noticeable difference in how much manual cleanup you need afterward
How to Edit Text After Dictating
Dictation is rarely perfect on the first pass, so knowing how to fix mistakes quickly matters. You can always switch to typing mid dictation session simply by using the keyboard, since dictation and manual typing work together in the same text field.
For quick corrections, click directly on the word that needs fixing and either retype it or dictate a replacement after selecting the word. On newer macOS versions, dictation also supports voice-based editing commands like “select last sentence” or “delete that,” which let you correct mistakes without touching the keyboard at all.
Reading dictated text back before sending anything important is still good practice, since homophones and technical terms are the most common source of errors.
Customizing Dictation Settings
1. Changing the Keyboard Shortcut
If double-tapping Fn does not suit your workflow, you can assign a different shortcut. Go back to System Settings, open Keyboard, then Dictation, and click the shortcut dropdown to choose an alternative key combination. Picking a shortcut you will not accidentally trigger while typing normally is worth the extra thought.
2. Selecting a Different Language
macOS supports dictation in dozens of languages and regional accents. Inside the Dictation settings, click the language dropdown to add or switch languages. If you regularly write in more than one language, you can add multiple dictation languages and switch between them from the same menu without reopening System Settings each time.
Once the basic settings are in place, you can personalize the desktop too — here’s how to change wallpaper on Mac
Dictation vs Voice Control: What’s the Difference
Dictation and Voice Control are often confused, but they serve different purposes. Dictation converts speech into typed text inside a text field. Voice Control goes further, letting you navigate the entire Mac interface by voice, including opening apps, clicking buttons, and controlling the cursor.
If you only need to write emails or documents hands-free, dictation is the simpler and lighter tool. If you want to operate your whole Mac without touching a keyboard or mouse, Voice Control, found in the Accessibility section of System Settings, is the better fit. Some users combine both, using Voice Control for navigation and dictation for longer text entry.
Troubleshooting Common Dictation Problems
1. Dictation Not Working
If dictation refuses to start, first check that your Mac’s microphone permissions are enabled. Open System Settings, go to Privacy & Security, then Microphone, and confirm the app you are using has permission. Also confirm dictation is still toggled on in Keyboard settings, since a macOS update can occasionally reset this preference.
A restart often resolves dictation that has silently stopped responding after a long uptime, particularly on Macs that have not been rebooted in weeks.
2. Poor Accuracy Issues
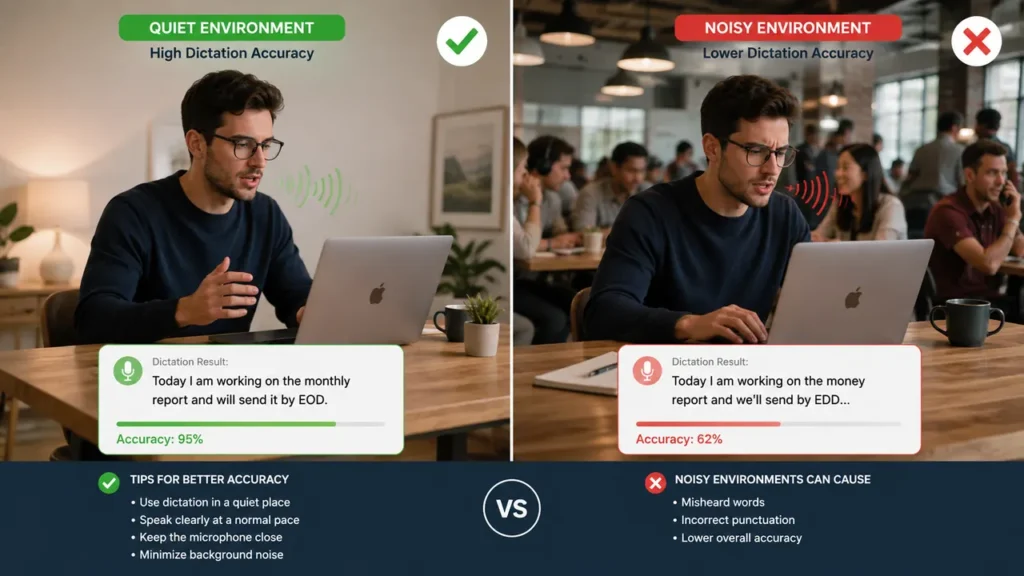
If dictation understands words incorrectly, background noise is usually the culprit. Move to a quieter room or use an external microphone if your Mac’s built-in mic is picking up fan noise or room echo. Speaking at a natural, steady pace rather than very fast or very slow also improves recognition significantly.
For technical vocabulary, names, or acronyms, dictation may need a moment to learn context within a sentence, so writing a sample sentence with the term once can help it recognize the word again later in the same session.
Tips to Improve Dictation Accuracy
Speak in complete phrases rather than single words, since dictation uses surrounding context to guess spelling and meaning. Pause briefly between sentences instead of running everything together, which gives the software a clearer signal for where punctuation should go.
Using an external or headset microphone tends to outperform a laptop’s built-in mic, especially in open offices or shared living spaces. Keeping your Mac’s software updated also matters, since Apple regularly improves dictation accuracy through macOS updates rather than requiring a separate download. Once your input settings are dialed in, you can personalize the desktop too with this guide on how to change wallpaper on Mac.
Best Apps for Using Dictation on Mac
Dictation works inside almost any app with a text field, but it feels especially smooth in Apple’s own apps like Notes, Mail, Pages, and Messages, since these are built and tested directly against macOS speech recognition. Third-party apps like Google Docs and Slack also support dictation well through the standard macOS text input system.
For long-form writing, some users prefer combining dictation with Pages or Notes for a first rough draft, then editing with the keyboard afterward. This split approach tends to produce cleaner results than trying to dictate a fully polished document in one pass.